Installing the Service Mode Server
-
Open Windows Explorer and navigate to the directory that contains the
IEEInstallSuite.exe file. -
Double-click IEEInstallSuite.exe to open the file. This will start the extraction process for the contents of the installer. This may take several minutes.
-
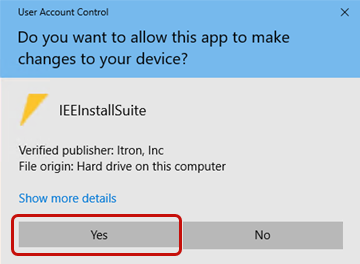
When the extraction process has completed, the User Account Control dialog will appear, click Yes.
-
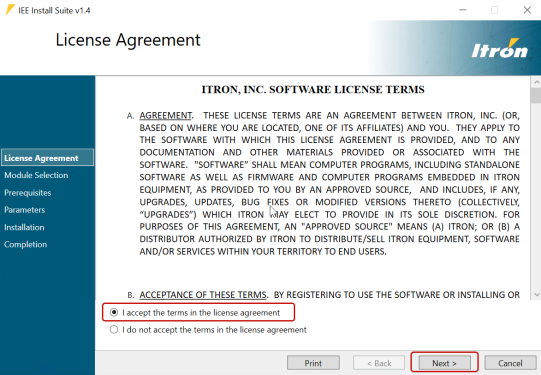
On the Itron Software License Agreement screen, read the agreement, select I accept the terms in the license agreement, and then click Next.
-
In the Service Mode Server dropdown menu, select Install, and then click Next.
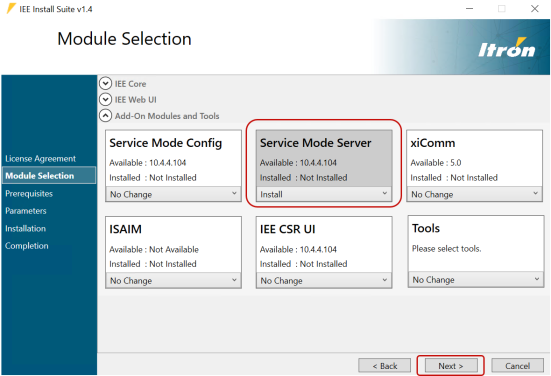
The Service Mode Server tab appears on the Parameters screen.
-
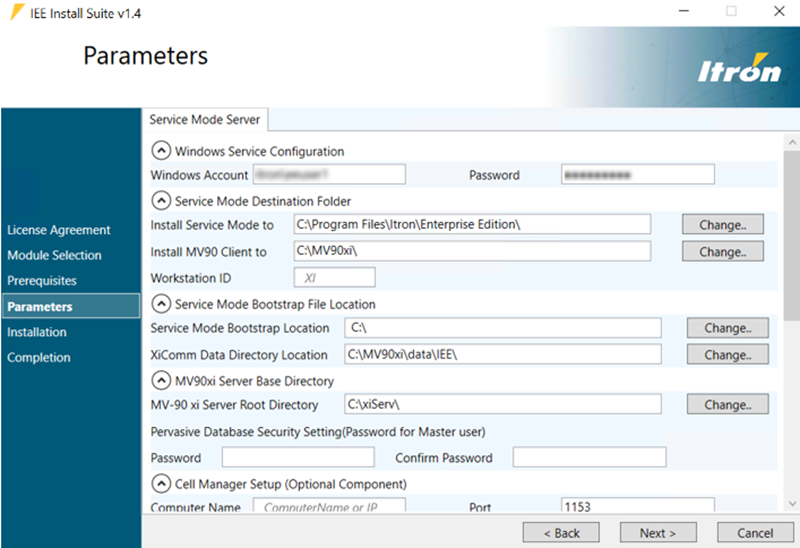
In the Windows Service Configuration section, complete the following fields:
-
Windows Account. Enter the domain and name of the user account that you logged on with.
-
Password. Enter the password for the user account.
-
-
In the Service Mode Destination Folder section, complete the following fields:
-
(Optional) Select Change to select a different Install Service Mode to path.
-
(Optional) Select Change to select a different Install MV90 Client to path.
-
-
In the Service Mode Bootstrap File Location section, complete the following fields:
-
Service Mode Bootstrap Location. Select Change to select the Service Mode Bootstrap file.
Note: Before attempting the Service Mode server installation, at least one IEE application server should be installed and running correctly. The IEE Install Suite – Service Mode Config must also be run and installed on the IEE application server and configured properly. Once installed, using the UIBootStrap tool on the IEE application server, set the Certificate Purpose = Encrypt Database Connection to Transmittal to Client, and then click Save Client Bootstrap. This should generate a
ServiceModeBootstrap.configfile that will be used for this setup. Be sure to change the XiComm Data Directory Location to c:\xiserver\data\IEE\. -
XiComm Data Directory Location. Select Change to select the directory location.
-
-
Select Change next to the MV-90 xi Server Root Directory field to select the directory location.
-
Complete the Password and Confirm Password fields. The password cannot exceed eight characters.
-
(Optional) Complete the Computer Name field and Port fields.
Note: If you changed the location of the base drive, click the Folder icons to update the Service Mode subdirectories. Leave the Temporary/Work Files subdirectory as the default.
-
In the Service Mode Server Subdirectories section, do not change the default location for the subdirectories. Click Next.

-
Click Next. If you receive an error message, click OK and continue to the next step.
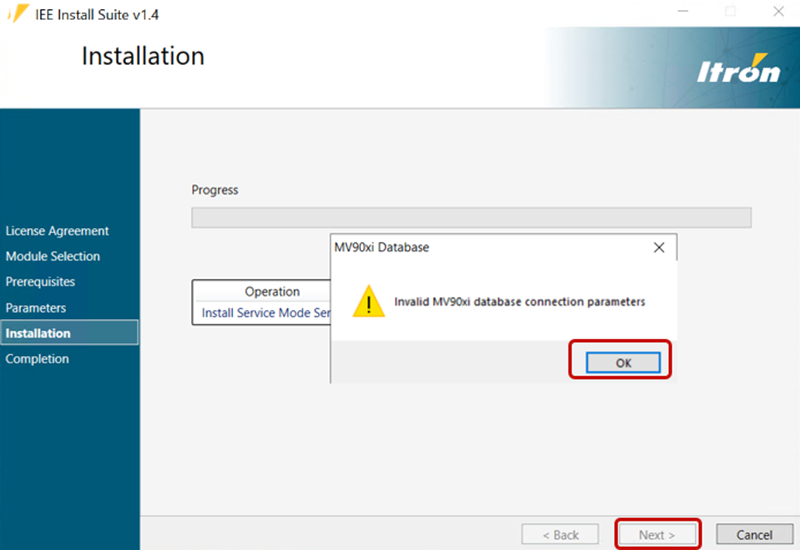
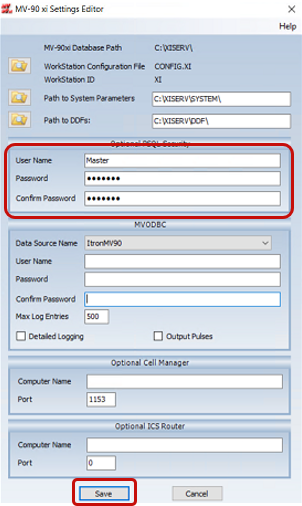
The MV-90 xi Settings Editor dialog appears.
-
In the MV-90 xi Settings Editor dialog:
-
Enter Master in the User Name field.
-
Enter the same password that you previoulsy entered int the Password and Confirm Password fields.
-
Click Save.
-
-
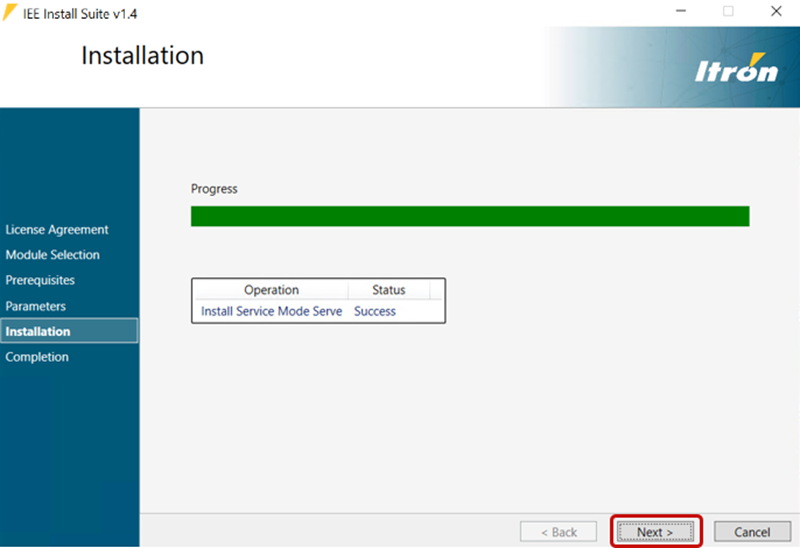
Click Next. The Installation screen appears.
-
Click Proceed to begin the installation. The installation may take several minutes.
-
When the installer has completed the installation, click Next.
-
On the Completion screen, click Finish to close the installer.
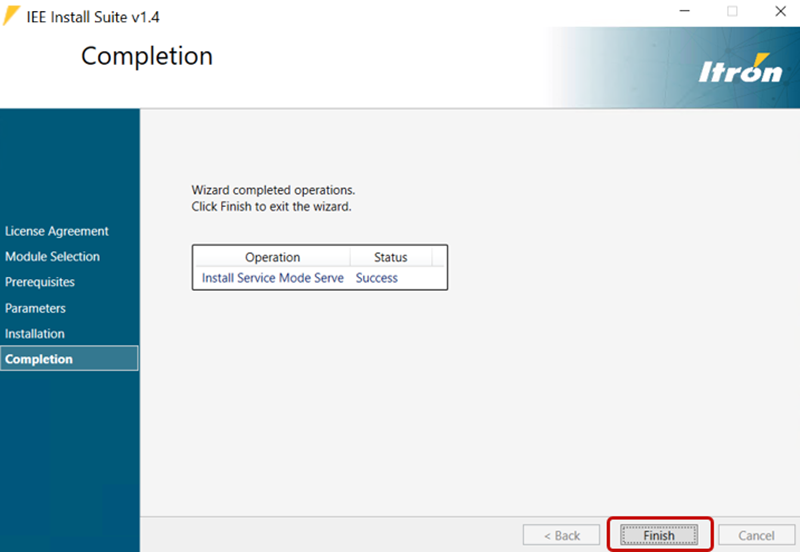
Note: If the installation failed, select Open Failed Installation Log to view the log file, correct the issue, click Next, and repeat the installation process.
-
Check the Services Panel to confirm that the Itron IEE application server sevice displays a status of Running and is using the Windows Account indicated during the installation process. If it is not running, there may be an issue with the
ServiceModeBootstrap.configfile or the SM Server may not be able to communicate with the IEE application server.Note: If you are installing Service Mode on multiple computers, share the location of the xiServ directory and all the subfolders. You will need to grant access to all Service Mode workstations.
-
Convert the backed up .v90 file on //xiserv/ master, //xiserv/ system, and xiserv/ddf folders from 2.0 to 5.0.
-
Copy and replace the converted/upgraded files to the respective folders.
-
Restart the Actian (Pervasive) Service.